Setting up a Linux Mint 17.3 MATE PC
Or, in my case, upgrading from my July 2015 17.2 system to my January 2016 Mint 17.3 Rosa system. My first (only slightly paranoid) move was to spend five minutes backing up all my 17.2 system and configuration files into a handy 4.8GB lump of TAR on an external hard drive ("just in case"). You can do this backup in one swell foop with one command line spell. Open a terminal in your chosen (or — in my case — newly-created) backup folder on your chosen device, and type:
sudo tar -cvpzf backup.tar.gz --one-file-system /
When that had finished I simply closed all my desktop applications before using the "Upgrade your system" option on the Mint Update Manager. It took about five minutes to download and automagically install all the shiny new stuff. Barely enough time to put the kettle on to make the hot beverage of your choice. (I assume you know how to put a kettle on.) Then you just reboot Linux.
Now back to the original 17.2 notes...
For my reference1 here's how to set up and configure my latest (January 2016) Linux Mint 17.3 MATE system on BlackBeast Mk III. These notes are for my next rescue escapades. I moved off my Linux Mint 17.1 Xfce 4.12 system in a desperate, last-ditch attempt to shake loose all aspects of any nVidia and Radeon video drivers malingering around and (possibly) now making it impossible to drive my third Asus 27" screen at its native 2,560 x 1,440 resolution. This was after giving up on the spiffy 40" Philips 4K monitor — with its dreadful propensity to video tearing and lag — as a completely hopeless case...
Step #1 was to reset the BIOS to use the integrated graphics Intel Xeon chippery on the motherboard. This recognises and supports the Asus via hdmi (though not via DVI-D [which is worth knowing]). Then physically remove the graphics card, and hook up the screen to the hdmi output on the motherboard.
Mint 17.2 MATE installation then simply consists of booting from a USB stick with the 1.6GB 64-bit ISO image burned on it. Simple enough, surely? Yet on BlackBeast Mk III this was more fraught than it should be as, after booting, the BIOS is happy to ignore the boot order you tell it, and take pot luck, at random, from anything it can lay its hands on. Patience and several re-tries do the trick.
Moving home
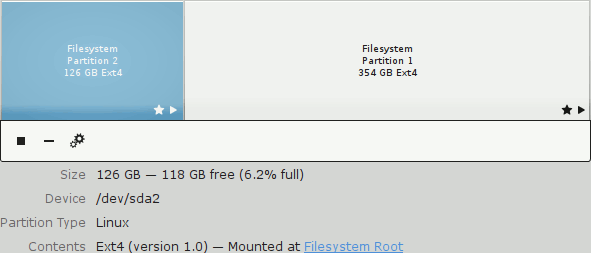
Learning from prior experience, this time my /home file space is not on the same partition as the Linux system itself (though it's still on the same physical SSD). The home folder set up by Linux during the installation now points to my original /home dataspace, but in its new partition. Running GPartEd from the "live" distro was able to shrink the previous single 480 GB partition down to 354GB and then push it along the SSD, thus opening up 126GB of unallocated space for the new Linux system. It took about 30 minutes, but left all my user data and hidden configuration files very much intact. This is a Good Thing.
The new Linux system volume (sda2)...
... is the smaller of the two partitions on the 480 GB "system" SSD. Linux mounts it at "/" (root):
/home (sda1)
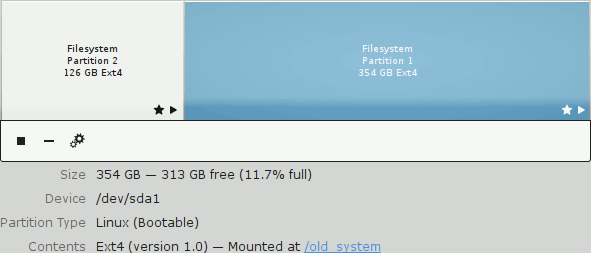
Further "along" this same first SSD (but now in its own 354 GB partition) is my /home playground. "Those who know" still both swear blind "This is (far) more than you'll ever need for Linux." Linux mounts it at "/old system", though I prefer to think of it as where I hang my hat:
/data (sdc1)
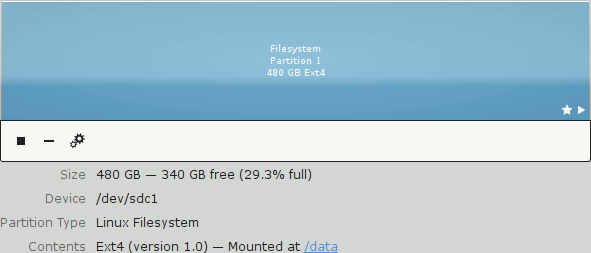
Is a useful second 480 GB SSD to supplement the space I have in /home on my first SSD. /data is currently mostly holding user data from my previous Win8.1 Pro system. There are two bad sectors on this second SSD (I shall try to tread lightly on them!)
/backup (sdb1)
Is, I hope, self-explanatory. This is my third 480GB SSD:
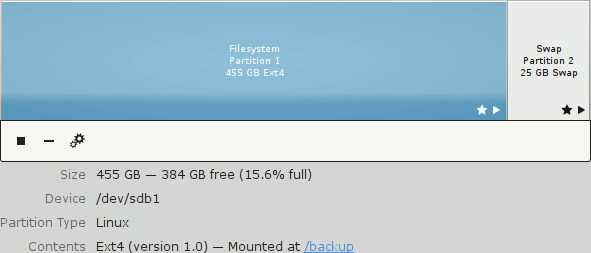
As you can see, I also keep the Linux swap partition on this SSD.
fstab entries
Linux mounts these drives wherever you tell it to. Use "fstab" in /etc to define where to mount these three SSDs, and the /swap partition. It makes for a more robust system if you identify the various SSD partitions by their UUID, so first, let's find out what they are. The magic spell is:
david@BlackBeast /old_system/home/david/Desktop $ cd /dev/disk/by-uuid
david@BlackBeast /dev/disk/by-uuid $ ls -l
total 0
lrwxrwxrwx 1 root root 10 Jul  4 07:30 222c04e5-277c-4b03-905a-30fc9bcb7027 -> ../../sdb1
lrwxrwxrwx 1 root root 10 Jul  4 07:30 2547dcdc-6fd8-4d2e-a553-ee33ec1e276f -> ../../sda2
lrwxrwxrwx 1 root root 10 Jul  4 07:30 97033468-aa92-421d-906d-fa3e2cedd1f7 -> ../../sdc1
lrwxrwxrwx 1 root root 10 Jul  4 07:30 af61ebe8-7d74-4590-b8dc-4d92dfe78b43 -> ../../sdb2
lrwxrwxrwx 1 root root 10 Jul  4 07:30 fb3a4c9d-1bb2-4175-b9c2-ad9a6bc3c672 -> ../../sda1
So now we can plug those values into the fstab file...
# <file system> <mount point>   <type>  <options>       <dump>  <pass>

# / was on /dev/sda2 during installation
UUID=2547dcdc-6fd8-4d2e-a553-ee33ec1e276f /             ext4    errors=remount-ro 0   1

# new swap is on /dev/sdb2
UUID=af61ebe8-7d74-4590-b8dc-4d92dfe78b43 none          swap    sw                0   0

# this is the old system partition, now /dev/sda1 - used currently for /home
UUID=fb3a4c9d-1bb2-4175-b9c2-ad9a6bc3c672 /old_system   ext4    defaults          0   2

# /dev/sdb1 contains backup data
UUID=222c04e5-277c-4b03-905a-30fc9bcb7027 /backup       ext4    defaults          0   2

# /dev/sdc1 was windows main data
UUID=97033468-aa92-421d-906d-fa3e2cedd1f7 /data         ext4    defaults          0   2
If and when I can afford (or need) to add a new SSD into the slot once occupied by my spectacularly-failed old 240 GB one,2 and my peculiarly independent-minded motherboard/BIOS combo decides to move SATA ports around at random (don't laugh; it seems to happen) then, by using these UUID identifiers, this wouldn't matter.
Access to my two NAS drives
That "fstab" can also be persuaded to mount the two NAS drives — and provide clickable links to the various subfolders of them — all without the previous fuss of an autofs installation. It just needs a little bit more work. Take NAS #2 (for example). This is my newer Synology unit, containing a 4 TB RAID1 pair of spinning rust disks. Its network address is 192.168.1.67 and it has three top-level data folders — "Music", "Photos" and "Videos".
- Create a hidden folder (hidden, just to keep it out of sight so I don't do anything silly to it) called ".creds" in /home/david
- Create a "credentials" file called "NAS_TWO.creds" in this (hidden) folder
The credentials file (one for each NAS, of course) contains just two lines — the same username and password with which I login via its web interface when I want to inspect it or check for updates:
username=admin
password=(my secret password!)
Next, create one directory for use as the mount point for each top-level data folder. I created these under /NAS in the root directory "/" (again, to keep them where I won't trip over them or do anything silly to them). So, for example, the Music folder on NAS #2 is mounted at /NAS/NAS_TWO/Music and I have a symbolic link to it in /home/david/NAS_TWO

When I click on it, the NAS spins up (if necessary) and then I can see the contents of the "Music" folder on NAS #2.

Finally, define each of the top-level folders on each NAS device in /etc/fstab as here:
#
# Samba shares for Synology Nas One (3TB white)
//192.168.1.98/Documents   /NAS/NAS_ONE/Documents    cifs credentials=/home/david/.creds/NAS_ONE.creds,iocharset=utf8,sec=ntlm 0 0
//192.168.1.98/Molehole    /NAS/NAS_ONE/Molehole     cifs credentials=/home/david/.creds/NAS_ONE.creds,iocharset=utf8,sec=ntlm 0 0
//192.168.1.98/Music       /NAS/NAS_ONE/Music        cifs credentials=/home/david/.creds/NAS_ONE.creds,iocharset=utf8,sec=ntlm 0 0
//192.168.1.98/Pictures    /NAS/NAS_ONE/Pictures     cifs credentials=/home/david/.creds/NAS_ONE.creds,iocharset=utf8,sec=ntlm 0 0
//192.168.1.98/Podcasts    /NAS/NAS_ONE/Podcasts     cifs credentials=/home/david/.creds/NAS_ONE.creds,iocharset=utf8,sec=ntlm 0 0
//192.168.1.98/Videos      /NAS/NAS_ONE/Videos       cifs credentials=/home/david/.creds/NAS_ONE.creds,iocharset=utf8,sec=ntlm 0 0
# Samba shares for Synology Nas Two (4TB black)
//192.168.1.67/Music       /NAS/NAS_TWO/Music        cifs credentials=/home/david/.creds/NAS_TWO.creds,iocharset=utf8,sec=ntlm 0 0
//192.168.1.67/Photos      /NAS/NAS_TWO/Photos       cifs credentials=/home/david/.creds/NAS_TWO.creds,iocharset=utf8,sec=ntlm 0 0
//192.168.1.67/Videos      /NAS/NAS_TWO/Videos       cifs credentials=/home/david/.creds/NAS_TWO.creds,iocharset=utf8,sec=ntlm 0 0
If you finalise the fstab table before you've created the mount point directories (my mistake first time I did it) you end up with a mess of unmounted stuff on your desktop and it's all locked to root, which is both unhelpful and, frankly, depressing. Don't do it.
Current top-level contents of /home
And here we are:
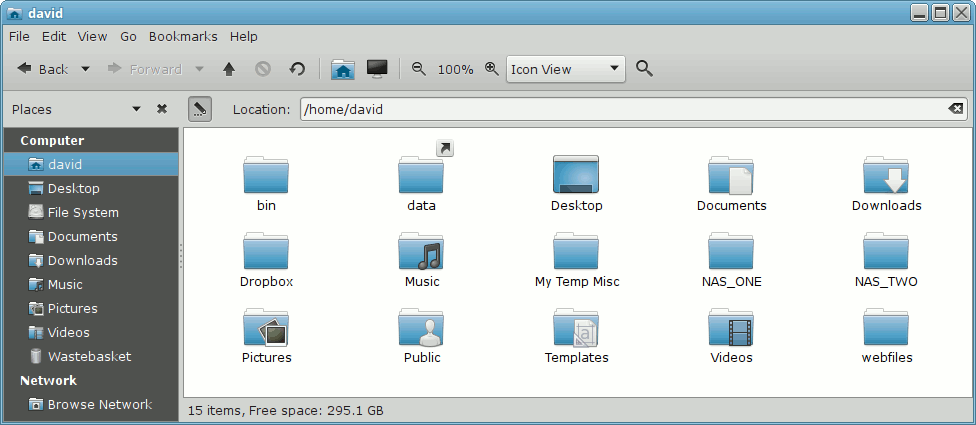
The first item (bin) is a hangover from an initial attempt to auto mount the NAS drives. The second item (data) is a symbolic link to /data on /dev/sdc1.
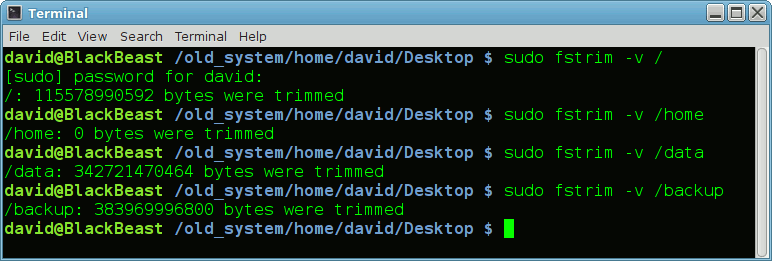
Trimming my SSDs
Best not done too often, but better not left undone, either:
Setting up a webserver on Localhost
I've described here the steps needed to get lighttpd up and running as a service on BlackBeast to do all my local web page serving inside the firewall. (In addition, that is, to the lighttpd server also running on the Raspberry Pi2 upstairs. Belt and braces, that's my philosophy.)
Application software
I've described here the various alternatives Linux offers to the set of programs I was using on Win8.1 Pro.
Printing and scanning
My HP LaserJet Pro MFP 125a can print and scan under Linux Mint. Start by running "hp-setup" in a terminal to download and install a proprietary binary module that it needs from the HP web site. There's a well-illustrated walkthrough here. It helps if you don't forget to install XSane, too, of course. That plugin is used by the GIMP to "create" an image by driving the scanner and loading the scanned image data into GIMP's window, ready for you to work on.
Do not do what I did! After a couple of months of completely trouble-free scanning and printing HPLIP suddenly popped up a window saying "Upgrade available". I clicked on it, and thus downloaded (and went on to install) the latest 3.15.7 build of HPLIP. It probably works fine for most people. Alas, I'm not most people, so it was a Bad Thing. I really (I mean really) should have ignored it. It killed my printing (though I could still scan). I ended up having to expunge all traces of HPLIP (killing my scanning also) before stepping back a couple of releases to the 3.15.4 build and making and installing the whole shooting match from scratch.
Notes on get-iplayer
The only way to snaffle all that lovely BBC radio jazz and "Late Junction" material. The PPA keeps a more up-to-date version than the one currently tucked away in the Mint 17.2 distro.
sudo add-apt-repository ppa:jon-hedgerows/get-iplayer
sudo apt-get update
sudo apt-get install get-iplayer
The first line tells Linux about a personal package archive. get-apt will check it out for obvious problems, but only do this with something you trust. The second line tells apt to refresh its list of package sources. The third line installs get-iplayer and its dependencies (including rmtpdump).
Notes on discovering the music on BBC radio programmes
My habit of downloading BBC Radio 3 programmes from their weekly "Late Junction" and (various) "Jazz" strands has enabled me to amass a sizeable pile of delightful music, but with no easy way of knowing exactly what each downloaded music file contains. Take, for random example, the edition of "Jazz Record Requests" that was transmitted on 7th December 2013.
I have the downloaded .m4a file, and its file name already contains all that's necessary. Namely, the "pid" (programme identifier) that ties it to the BBC process that builds a web page of associated information. (Notice I don't say "web page", but "process that builds" a web page. A crucial difference when it comes to turning that pid into a human-readable list of music tracks, because simply eye-balling the source code of the web page gets you precisely nowhere.) Which is where Brian's magic Python slithers on to the scene.
It swallows the "pid" and sets about a series of processes that reconstruct the bits of the web page that enable it to data scrape precisely the music tracks information that appears on the BBC's page even though it is quite beautifully obfuscated from the casual human reader of the source code of that page. It's probably not even deliberately obfuscated. The Beeb just wants to assemble and display the information to the reader of their web page in an automated way and not have to worry about manual maintenance.
So, feeding Brian's Python (musiclist.py) the "pid" — in this case, b03kny0b — eventually regurgitates the following, saved for me in a text file named as the "pid":
http://www.bbc.co.uk/programmes/b03kny0b

BBC - Jazz Record Requests, 07/12/2013 - Music Played

00:00:  Tubby Hayes - The Surry with the Fringe on Top
00:07:  Duke Ellington - Prelude to a Kiss
00:10:  Stan Kenton - Dragonwyck
00:15:  Frankie Newton - There's No Two Ways About it
00:19:  Lew Stone - Etude
00:23:  Sidney Bechet - Blues My Naughty Sweetie Gives to Me
00:30:  Django Reinhardt with Rex Stewart's Feetwarmers - Montmartre
00:32:  Dizzy Gillespie - Good Bait
00:36:  Stan Tracey - Rocky Mount
00:44:  Jo Fooks - Dr No Blues
00:48:  Peter Nero - It's All Right With Me
00:52:  Cécile McLorin Salvant - Woman Child
00:36:  Horace Silver - Rocky Mount
Notes on gscan2pdf
The last, best, hope for doing any OCR. The PPA keeps a more up-to-date version than the one currently tucked away in the Mint 17.2 distro.
sudo apt-add-repository ppa:jeffreyratcliffe/ppa
sudo apt-get update
sudo apt-get install gscan2pdf